Blog Background

Showing posts with label Interior Design/Decorating. Show all posts

Saturday, April 27, 2013

Hippity Hoppity

photo 1

Hi!  I am a little late posting this.  However, I think this project turned out pretty cute; therefore, I wanted to go ahead and share it with you even if we are a bit past Easter.  You could apply the same concepts to make something for summer.

Judd and I just moved into a new house in a new city.  We feel so blessed to be in this new location and starting this next chapter in our lives.  I graduated with my Ph.D in December 2012 and was hired the same month for a new job at my alma mater, Auburn University, as the Director of Assessment and Strategic Planning in the Division of Student Affairs.  I worked out my 30-day notice at my job at UAB, said goodbye to my dear colleagues there, and came straight to Auburn.  The last few months have been a whirlwind of change in the best ways possible.

The house we are living in was actually the first one we rented as newly weds when we were first graduate students.  After we moved out, Judd’s parents bought the house and it has been vacant ever since.  I was eager to improve the curb appeal a little and to make it apparent that someone really lives in the house now.  I set out to find something pretty to hang on the front door.

The idea for this project came from a shopping trip with my MIL for something cute to put out front.  I found some really precious spring/Easter décor made from painted burlap.  I was in love with a particular carrot.  When I turned it over to check the price; however, it was all I could do to keep my pupils from turning to dollar signs like in cartoons.  The carrot I liked so much was priced at around $50.  I could not believe some cheap burlap, stuffed with trash bags, with some paint slapped on it could cost so much.  We immediately got in the car and went to the local craft store to purchase the materials to make this one ourselves. It turned out pretty cute. What is to follow in this post is a quick tutorial on how to make your own Hippity Hoppity Easter Carrot.  I made mine for well under $10 because I already had a good many of the necessary supplies.

The items below are what you will need to make this craft.

  • 1 yard of cream burlap folded in half
  • Acrylic paints (orange, white, and two shades of green)
  • Fabric paint with a tip for writing (black)
  • Sharpie marker
  • Scissors
  • Paint brush 
  • Kitchen trash bag or drop cloth to place underneath while painting
  • Several plastic garbage bags or plastic grocery sacks for stuffing
  • Hot glue gun
  • Small piece of wire to use for hanging
  • paper plate to serve as a paint palate

photo 2

The first step is to cut your burlap into the desired carrot shape.  Since I folded the burlap in half, I cut both the front and back sides of the carrot out at the same time after drawing the shape I wanted on the top piece of burlap with my sharpie marker.  Don’t worry about making marks on the fabric because the top piece with the lines on it will eventually be placed underneath the clean piece.  The lines will go on the inside of your carrot and will never be seen again.

Next, paint on glue using a paint brush dipped in water.  This step will make your burlap stiff and will help your paint to go on better.  Allow the glue to dry.

photo 1 (2)

After you have drawn your template.  Place it beneath the clean piece of burlap.  Use the lines you drew to trace your design with paint .  Make sure you are painting on what is now your clean front piece of burlap.  In the photograph below, I peeled an edge of my clean portion up a bit so that you can see the template I drew sitting underneath it.  Next, paint your stem entirely with the darkest shade of green. 

photo 3

photo 4

While the green stem is drying, use the faint lines showing through from the bottom piece of burlap to guide the painting of your white chevron patterned sections.

photo 5photo 1

While your white painted sections are drying, use the lightest shade of green to highlight your stem. You may even want to use a bit of white paint for highlighting.

photo 2

Next, fill in the sections that are supposed to be painted orange.

photo 3photo 4

Allow all sections to dry well.  When ready, use the black paint with the tip for writing to write the message and then outline the carrot.

photo 5


photo 1

photo 3

Allow to sit for several hours.  I let mine sit out overnight.  When the writing and all other paint sections were totally dry, I hot glued about 3/4ths of the back of the painted side to the front of the side with the template drawn on it so that all exterior pieces look nice.   I left a space open to allow for stuffing in the plastic bags.  I completed gluing all sides together once I felt the carrot was properly stuffed.  Here is how it looked in the morning.

photo 5

I couldn’t wait to hang it on our front door.  I quickly  put the piece of wire through the carrot at the base of the stem poking it from the back to the front.  Then I curled the ends of the wire around my finger. 

photo 5

I was pleased with the finished product.  Our house sits back far from the street and we needed something large enough to show up from the road.  Since we’ve just moved, we haven’t had time to do any other types of curb appeal improvements.  For now, the carrot (or our next front door craft to come) will be enough to hold me over and make it seem like people actually live in the house.

Happy crafting!

Thursday, September 13, 2012

Jewelry Storage

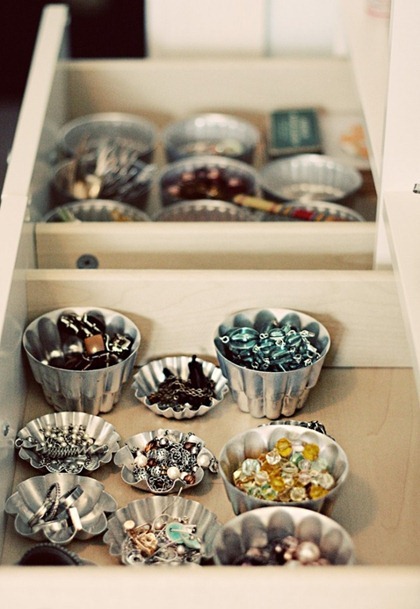
I am on the hunt for an attractive yet functional way to store my jewelry. While I have a few nice pieces, most of my collection is costume jewelry. I want to protect the nice pieces and any pieces that might tarnish. I want to be able to easily access each piece when I am in a hurry and on my way out the door. I want to display the larger pieces and the most eye-catching ones in an visually appealing way.

I’ve found a few ideas on Pinterest. However, I do not have a space in my bedroom that is low enough to do anything that sits on top of a piece of furniture. The only furniture in our bedroom other than the bed is a tall chest of drawers and two mismatched nightstands. Also, there is no room in my closet. I’ve thought about using my nightstand; however, I can just see myself knocking something off with the covers or a pillow that may fall. So, I think the nightstand option is out.

I’m getting inspired by the following photos. Click each picture to locate the source via Pinterest.

172544229444746419_MaXJCiSK_c16

172544229444746406_CZHqlksY_c16

172544229444746324_0WLxOtx3_c16

172544229444746643_QMwBZalN_c15

172544229444746399_roFKMBF4_c16

162551867770763138_66WdhLHy_c16

172544229444746317_RqK381FY_c16

Do y’all have any tips or suggestions? Also, where can I find a nifty stand like some of the ones in these photographs? I look forward to sharing what I come up with and to hearing from you. I’ll keep you posted.

Saturday, January 21, 2012

Let There Be Two Lights

So, the lamps that I ordered at the beginning of December finally arrived.

I ordered two Julian apothecary lamps with an antique brass finish from Ballard Design.

They were intended to go on either side of our sofa. That's where they are in the pictures. Honestly, the wall between them looks a little bare now that they are in place. Maybe if I add some framed art pieces that whole side of the living room will come together.

What do you think so far?  I imagine that I will be buried in a sea of research underneath them pretty soon.

Monday, September 26, 2011

Burlap Walls

My brother, Bryan, and sister-in-law, Laura, moved into Laura’s Pawpaw’s house last weekend.  We got to go see it last night.  It’s a lovely home that Laura’s Pawpaw built himself.  While taking the tour we walked into a room that will be used as an office.  This room has many built-in shelves and has burlap on the walls.  My guess is that the burlap has been there for years.  I immediately said, “oh, I love the burlap wall treatment.”  Neither Bryan or Laura seemed too enthused about it.   I thought I would put this post together so that maybe they might be able to see a vision for the room that consists of keeping the burlap.  Either way, I’m sure they will make the room look great.  I just thought it might be fun to throw some inspiration photos together.  Congrats on your new abode, Bryan and Laura.

Burlap seems to be so, dare I say, trendy at the moment.  I hate to even  say that because burlap has been used for a  long time for many purposes.  Below are some images I found in a quick Google search of burlap and/or grass cloth used on walls.

What do y’all think?  Can you picture a space in your own home with burlap on the wall?  I think, given the right space, burlap on walls can be very attractive.

burlap_wall_covering_sage_going_on_green

Source: Sage Going On Green

Boxwoods_in_ATL

Source: Velvet and Linen, photo taken at Boxwoods in Atlanta, GA

Conference_room_back_wall_Design_Services_of_Charlotte

Source: (Flickr) Design Services of Charlotte

grass_cloth_walls_via_odietamo_Waterleaf_interiors

Source: Odie Et Amo, design by Waterleaf Interiors

grasscloth-wallcovering_via_home-decor-design

Source: Whitehaven

Friday, May 13, 2011

Pinteresting

I spy with my little eye…..

lots of posts about Pinterest.

The first one I saw was on Nest Egg.  This post was the first I’d heard about it.  I almost requested an invite that day but decided against it.

Then, the very next day, I saw another post about Pinterest on Blueprint Bliss.  I considered it a sign that I couldn’t seem to escape this thing.  So, I asked for an invite on day two of my Pinterest sightings.

Boy am I glad I did.  It is amazing!!!!  It is like one giant virtual inspiration board for everything from design, to kids stuff, to entertaining ideas, and much more.

As you may have already figured out, you have to be invited to join (but it’s free).  If you would like an invite to Pinterest just leave a comment with your email on this post and I’ll send you an invitation.

Here are a few things I have “pinned” the last few days.


21512106_BcCWzrLe_b

22305023_uHyWVP9n_b

mmm

 wwww

 21606190_54ktlUYU_b

Thursday, April 14, 2011

How To: Make A Burlap Bulletin Board

As you may know from some other posts, my husband, Judd, is a landscape architect. Recently, he expressed interest in having a few bulletin boards to put in his studio. And, since I love a project, I volunteered to make them for him. I wanted to use something with a natural feel given his profession. I thought burlap would give just the right amount of texture and earthiness.

The bulletin board project was really easy. However, make sure to iron your fabric before you get started. I forgot and had already stapled a good bit before I thought about it.

Other than an iron, here are a few things you will need to get started.

  • cork board (I used an old one Judd’s mom sent with him to college)
  • fabric (in this case, burlap)
  • scissors
  • staple gun
  • staples
  • tape measure

4

To measure your fabric, lay it out so that it covers a few inches past each side of the board. Make sure you will have enough fabric to pull around to the back side and staple. Then cut where needed. If you want to be really exact or particular use your measuring tape to make sure you have the same amount on each side.

5

In an attempt to “keep it real” here at TLP I’ve included the picture below. Things are not always as pretty as they appear in blogland. As you can see here, I work best when sitting on the floor, between our dog and my husband, in our living room. We were watching a movie in our less than spotless house. My apologies for the shadow in the pictures. Cole’s dog fanny was casting a shadow on my project. You would think that the sound of a staple gun in use would be enough to wake him. Nope.6

The next step is to staple the fabric to the back side of the wood frame starting in the middle of each side. Make sure to pull the fabric taut. Save the corners for last.

8

Fold each corner to ensure that it is sharp and flat. Play with the fabric until you get each corner just the way you want it. You can think of wrapping a present when folding the corners. It is kind of the same concept.13

When all staples are in place, trim the excess fabric from around the corners and along each side.15

It should look a little neater when you are finished. 12

Flip the board over to make sure it is smooth.

16

Now you have a few options on how to dress up the board a bit. You can keep it plain, just the way it is, if you like a more simplistic look.

18

Or you can use a piece of the fabric that you trimmed off of the back to make a burlap bow. I attached the bow with a flat push pin.20

21

Or you can use the same piece of trim to add a stripe down your board. Although I thought the bow was cute, I’m pretty sure that was not the look Judd was after. :) Below is what I decided on for his pin up board. There were four flat push pins left in the board from when Judd had it in college. I decided to re-use them as nail heads running down the strip of fabric. I stapled each end of fabric on the back of the board and evenly distributed the “nail heads” on the front.22

25

He can use this little detail to wedge in photographs, notes, etc without having to poke a hole in them. I hope he likes his board. What do you think?

Wednesday, March 30, 2011

You’ve Got Deals

Hello friends,

“You’ve Got Deals” is what my computer should say every morning when I log on to my email.

This morning, I took the plunge and purchased my first Groupon.  In case you don’t know, Groupon is an online coupon group for your city.  I’ve often lurked on Groupon, but today I bit the bullet and purchased my first great deal. 

Straight from their website, here is how Groupon works.

“1. Get It

Check your email, Facebook or Twitter feeds for daily deals on cool local businesses.

2. Share It

Groupons are more fun when used with friends. Pass along deals by email or broadcast them to your social networks.

3. Enjoy It

Print the voucher or bring it up on your mobile device, then present it at the business to get your deal.”

So, today’s deal was from one of my favorite local stores, Harmony Landing.  This store has these chairs that I have been swooning over for the past 2 1/2 years. 

Lee-camel back

Yeah, I know, I  move at a snail’s pace.

Anyways, the deal was to purchase a $50 Groupon with a value of $200 at Harmony Landing.  Wahoo.

Maybe using this coupon by its expiration date of October, 2011 will be the little push I needed to take yet another plunge and order the darn things.  I plan to order two chairs and an ottoman.

Below is the picture Groupon used for today’s deal.  It is of some merchandise currently at Harmony Landing.

HL

Click here to get today’s Groupon Deal.