Blog Background

Showing posts with label Halloween. Show all posts

Wednesday, November 3, 2010

On the Day of Halloween…

Pumkinsbest

…our pumpkins expressed our love for Auburn University.

My pumpkin featured the face of the cutest mascot in all the land—AUBIE.

pumkinaubie

Judd’s pumpkin wasn’t his usual ornate, “mr. architect with fine motor skills pumpkin,” but it was still cute.  His pumpkins usually blow me away.  This year, however, Judd was on a conference call for most of the afternoon.  He didn’t get to spend quite the amount of time on his pumpkin that I spent on mine.  He quickly and cleverly got his point across with his jack-o-lantern though.  :) W-A-R       E-A-G-L-E!!!!

  Pumkineagle

 Pumkinsbetter

Tuesday, November 2, 2010

On the Day Before Halloween…

…our house was haunted with ghosts and was crawling with spiders.

I used one pack of glittery spiders from Wal-Mart to add a creepy effect around our house.  I put the spiders in our candles.  See below.

  spiders5

spiders2

As you can see in the photo below, I also used the spiders on our mantel.  The spiders were paired with bleeding candles.  The rest of the mantel decor consists of a ghost village I made in 2005 for our first Halloween as a married couple and a vase filled with orange berries and curling willow branches from my mother’s yard.  I spray painted the branches black.

ghostvillage3

In this post, I will share how to make the ghost village.  It looks great with candles behind it.  The flame of the  candles gives the appearance of ghosts floating behind the doors and windows.

I got the idea from a magazine years ago (I can’t remember which one).  To make the village take four pieces of black construction paper and fold them in half.  Unfold the paper and use each half as a different house.  Use an X-Acto knife to carve out any shape of windows, doors, and roofs that you like.  It is hard to tell in the photos but some of mine even have shutters and doors.  Next, use a glue stick to adhere yellow tissue paper to the backs of each opening.  Embellish with cut-outs of ghosts and pumpkins.  When finished, fold each house slightly and place them next to each other.  Put flameless or regular candles behind the village to add a spooky appearance.  Store flat and reuse year after year.

ghostvillage

In keeping with our scary decor, I covered the wine bottles in our bar area with Halloween labels I printed from a website.  I printed the labels on regular printer paper and rolled tape behind each corner.  I gently stuck them over the existing labels on our bottles.  Hopefully, they will be easy to remove when we are ready to put our house back to normal.

Click here for the site with the labels.

Poison

bar

By our front door, I filled frames with vintage trick-or-treat photos I found online.  These pictures were also printed on regular paper. I plan to store them all in a file folder and reuse them next year too.

treaters2treaters3treaters1

In our guest bathroom, I used another one of Martha Stewart’s ideas.  Martha put a ghastly reflection in her mirror.  I thought it was too cute.  Once again, Martha’s way of doing things was too time consuming for me. 

Click here for Martha’s Ghost Directions.

Ghost_Mirror_MS            

My ghost (shown below) took about 1 minute to create.  I used a white window chalk marker I already had that was left over from a sorority function years ago.  I just freehanded a ghost shape in our mirror leaving space for its eyes and mouth.

ghostmirrorghostmirror2

Next, I added a few more accessories to create one scary bathroom.  :)

spidersoap

This was another photo I found online.  I mounted this little witch over the artwork that is normally hanging in our bathroom.  She’s my favorite of the vintage looking pictures.

witch

Only one more Halloween post to go.  Whew.

Monday, November 1, 2010

On the Second Day Before Halloween…

…our candles began to bleed.

[I meant to continue on with my countdown to Halloween.  Clearly, I was unsuccessful.  I’ll try to wrap up all Halloween posts ASAP.]

Bloody candles  are another wonderful Martha Stewart inspired idea.  Martha’s candles (below) appear to be bleeding while lit.  You can read her way of making them here.

Or you can read about the way I made them on this post.  The directions are simple.  Light a red candle and hold it upside down over a white or cream candle.  The red wax will run down the cream candles to look like dripping blood.  My candles are shown in the photos below.

To make the candles without making a huge mess, I used the end of my scissors to create slits in the top of a shoe box.  I poked the candles in the slits.  The box held the candles while I poured the wax.

Abby_candle_making

candles2

Also, on the second night before Halloween my whole family followed the yellow brick road to a costume party.  I was told to go as Dorothy.  The night before, after I got out of class, I drove over to mom and dad’s to help mom make my Dorothy costume and my ruby slippers.  We had so much fun.  Mom made my Dorothy dress in one night with no pattern.  She always amazes me. 

For the ruby slippers, we took a pair of her old pumps and spray painted them red.  Then, I applied glue and some really spectacular Martha Stewart glitter from Michael’s.  In person, they really look great.

rubyslippers

We didn’t take pictures until after the party.  At this point, our costumes were a little worse for wear.  Judd went as the tin man.  For Judd’s costume, I spray painted a plastic automotive funnel and some poster board with metallic silver paint.  I used chrome duct tape to piece his costume together.  A red felt heart was the final touch.

JandA2

My brother, Bryan, and his wife, Laura, went as the wicked witch of the west and the scarecrow.  They cleverly used a hula skirt cut into strips as straw for Bryan’s costume.  Also, they pinned a regular witch hat to look like the the one the scarecrow wore in the movie.

B_and_L_1  

My parents went as the wizard of Oz and Glenda the good witch.  Mom made a badge that read, “I’m Good.”  It was really cute.

parents2

Thursday, October 28, 2010

On the Third Day Before Halloween….

…our house was swarmed by bats.

The idea of using flying bats as Halloween decor also came from Martha Stewart.  Although, I altered the directions for this project to better fit my time restrictions.  Sometimes Martha takes the long route.

Here is Martha’s batty lamp.  I thought everything about this picture was so cute for Halloween.

Shivering_Bats_Shade_MS  

You can follow Martha’s directions for her shivering bats by clicking here.  I found her process a little too time consuming.  If you are short on time, you can follow my directions found in this post.

The template I used for my little bats was the result of a Google image search for a black bat.  (My batty lamps are below.)  I chose the bat found in the template below because it had a simple shape that was easy to cut out.  I just right clicked the picture, saved it, and printed as many as I needed to fill all sides of each shade. (Pardon the poor photography on my part.  I snapped these on my way out the door with Judd’s iphone.  There was no time for staging or editing.  You still kind of get the idea right?)

Click here for Martha’s template.

Click here for the bat template I used.

Abby_bats_1

The materials you will need to make the bats my way are found below:

  • Computer
  • Printer
  • Scissors
  • Tape
  • Plain white printer paper

Martha’s instructions suggest you use her template, trace the bats on to black paper, cut them out, and hang them from wire inside the shade. 

My directions are simple.  Use the template for the easy to cut out bat shape I provided above or search for an image you like better.   Make sure the bat image you choose is already filled in with black.  That way, you can use your regular white printer paper and you can save yourself a step of having to trace the template onto black paper.   Who has time for that?  Not me.  :)

Abby_bats_2

Once you have printed the number of bats that you need, stack several sheets of bat printed paper up to cut out multiple bats at one time. 

When all the bats have been cut out, use one small piece of clear tape for each bat.  Put the tape at the top of each bats’ head with the sticky side of the tape on the white side of your paper.  Place the tape where half of the piece is on the bat and the other half is sticking up above the bat’s head.  Make sure your lamp is off and that the bulb is cool so that you do not burn yourself.  Adhere each bat inside your shade using the part of the tape that is sticking up above the head making sure that the black side of the bats are facing outward.

Finally, turn on your lamp and see the spooky shade you have created. 

I also put bats in our dining room chandelier.  I think they look spooktacular!

Abby_hanging_2

Wednesday, October 27, 2010

On the Fourth Day Before Halloween…

…our house was infested with mice.  Eeek!

If you are having a Halloween party this weekend or if you just want the house to be decorated for spooky fun try the ideas below.

I first got the idea to decorate with mice silhouettes from Martha Stewart.   As much as I love Martha, I often find that there is an easier way to create some of her projects than by following her directions.  Life is busy.  Who has time to follow all of the rules?  :)

Here was Martha’s mice infested bookshelf. 

Mouse Silhouettes  

You can find her directions by clicking here.  Or, if you are like me and have very little spare time, you can use my directions found in this post. 

The materials you will need to make the mice silhouettes my way are listed below:

  • Scissors
  • Computer
  • Printer
  • Note cards
  • Glue stick
  • Plain white printer paper

Martha suggested printing her mice template.  Next, her directions instruct you to trace the mice onto black construction paper and proceed to cut out each one.  Again, I thought that would just take way too long.  Well, that and I had already used my black construction paper for another project that I will show you in the coming days before Halloween.

Here is what I did.  (My bookshelf with mice is below).  On Martha’s template the mice are already filled in with black.  I just used my regular ole white printing paper and let the printer make black mice for me rather than tracing the template onto colored paper.  Voila.  One click to tell your machine to print and you have black mice.  I printed several pages of her template so that I had plenty of mice.  (Pardon the grainy photos.  They were all taken at night using Judd’s iphone.)

Click here to find the mice template.

Abby_Whole_Shelf

I proceeded to put several pages of the templates together at a time when cutting out the mice.  You know, cut out one mouse and have four because you’ve stacked multiple sheets when cutting.  To fully maximize the small amount of free time I have, I brought my printed templates with me and cut most of the mice out on my lunch break at work.  There is never a dull moment in my office.  Ha.

Abby_Mice_Colored_Books 

To make the mice stand up, I cut a few note cards into thin strips.  I placed one strip on each mouse and made sure it didn’t show from the front.  I then used a glue stick to secure the strips onto the back of the mice.  This gave them enough support to stand up.

Abby_Half_Shelf

Next, I turned most of the books on our shelf backwards so the pages would provide a better contrast with the mice.  This helped the silhouettes to show up better.  (Note: On a normal basis, I am vehemently opposed to turning books backwards on your shelf or covering spines with velum, cloth, etc.  I’ve noticed that a lot of designers are doing that lately to keep their rooms looking monochromatic.  I think it is absurd.  Books are for reading, sharing, and discussing.  They provide a deeper understanding of the world around us.  They are for spreading knowledge.  How will the designers and the owners of the homes they design be able to utilize their books if they don’t know which ones are which? OK.  I’m off my soapbox).  I figured for 31 days in October we could spare turning ours around; however, they will not stay like this.  We like our books.  We read and enjoy them all year long.

Abby_Two_Mice

Next, I placed the little critters on our bookshelf.  Most of them are freestanding.  I did, however, put a rolled  piece of tape on the backs and tails of a few of them for support.

Abby_Shelf_With_lamp

To up the spooky factor, I filled a basket with some glittered pumpkins and placed it on the shelf.

Abby_Pumpkins

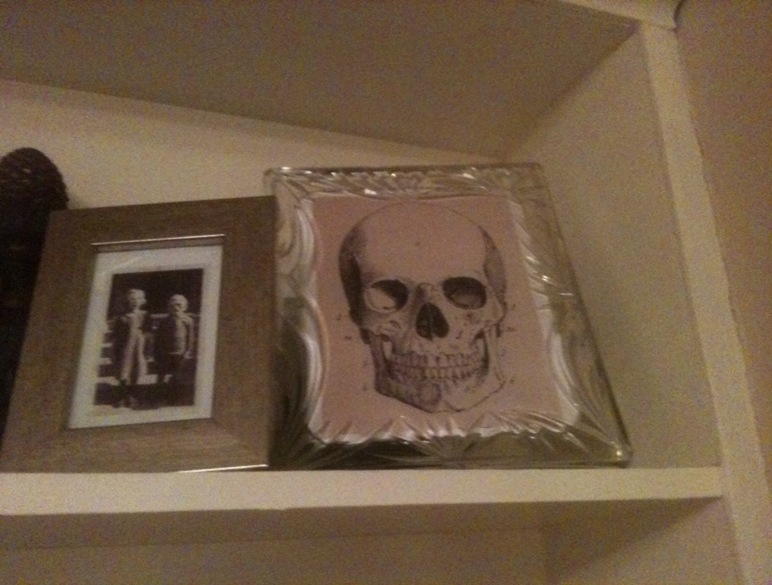
Also, I found some great websites that allowed me to print some creepy art to replace our usual photos on the shelf.  I just opened the frames and put these on top of our usual pictures.  Again, I just printed them on regular white printer paper.  I didn’t have any photo paper.  In my opinion, the regular paper added a flat look which increased the level of scary.

Click here to find the website with the bat art.

Abby_Mice_and_bats

Click here to find the website with the skull.
Abby_Skull

Overall, the project was easy and a lot of fun to create.  Also, I don’t think this will take long to put back to normal when Halloween is over.    You still have time to make this for the weekend.  If you do, leave a comment and share your post about it.  It would be fun to see how you’ve used the mice.

Abby_Dark_Shelf

Tuesday, October 12, 2010

A Trip Down Halloween Lane

There are so many blog posts that I’ve been meaning to write.  I’ve built up quite a list of topics.  Judd even has one he has been thinking about posting.  I’ve been so consumed with life in general that I have not had a chance to even start a single post.  I really enjoy blogging.  I’ve missed you folks.

Our house is all decorated for Halloween.  I can’t wait to show you all what I have done.  That will have to wait too.  I haven’t taken any pictures of it yet.

Anyways, since I’ve been a total lurker of all of your great blogs lately, yet haven’t managed to post on mine in the past decade (well…two weeks but it feels like a decade in blogosphere time) here is a quick overview of a few of our Halloweens past.  These are all photos I just happen to already have scanned and saved on my computer.  I promise to do a post with actual substance sometime soon.

Judd’s always loved Halloween too.  Here he is with his brother, Colby (left). 

13

This is me on our front porch at my old house in Huntsville, AL with my oldest friend, Rachel.  She was in my big brother Bryan’s grade.  We were next door neighbors.  She, her sister (hi Carolyn),  Bryan, and I were pretty much inseparable.  We spent lots of afternoons doing homework together.  We also spent lots of time together decorating for Halloween, trick-or-treating, and even recording a “spooky sounds” tape in their storm shelter.  Good times.

100

Fast forward several years to 2002.  This is my sorority sister, Jaclyn, and me at a fraternity party in Auburn.  That was also a good time.  Ha.

Halloween 2002 at Chi Phi House in AU

Continue fast forwarding a few more years to 2004 when Judd and I were engaged.  We hosted a pumpkin carving party at his house (which is now the house we use to tailgate in at Auburn.) 

141

This little trip down Halloween lane was fun for me.  I hope you enjoyed it and I hope that you make happy memories with your friends and family this Halloween.

Tuesday, November 10, 2009

Keeping it Real


So I know we bloggers like to keep it real. Well, I wouldn't be in keeping with that idea if I didn't post our Halloween pictures from a few weeks ago. We are usually a conservative, thoughtful, well educated, Ralph Lauren wearing couple. Well, not on Halloween. Our friend Tripp came up to join us in Auburn for the AU vs. Ole Miss game and also to go out with us on Halloween night. He got the genius idea that we should all go as 80's rock stars. Here is what followed.
Judd, Me, and Tripp

Like a true rock star

The band

Me, my sweet friends--Allison who went as a child of the 80's (We all thought she looked like Deb from Napoleon Dynamite) and Stephanie who also went as an 80's person. Her costume was especially funny to us though because it was our high school's freshman dance team costume from the 1998-1999 school year.

This was our whole group that went out on Halloween night. From Left to Right: Judd, Abby, Tripp, Stephanie, Chad, and Allison. (Note: Chad went as a redneck University of Alabama fan. Judd painted that "A" on his shirt before we left the house.)

I don't even have words for this one. He was definitely keeping it real.

The make up artist at our house as we were getting ready was our friend Morgan. She, Judd, and Tripp were all in graduate school together. Her costume cracked me up. She went as Kate Gosselin from the TLC show Jon and Kate Plus Eight. She had 8 little babies tied around her. She even gave one glasses so he could be Aidan. I loved her Kate wig.

So that sums it up. I thought these pictures would for sure be keeping it real. Blogs make life seem perfect and well decorated. We like to maintain normalcy most of the time; however, we really enjoyed having a night of fun.

On a side note: When we arrived at the bar a man walked up and handed us an envelope. He said Judd had been picked by the mystery judge as the winner of the costume contest. We won $50 dollars and didn't even know there was a contest. It really made our night. Ha!